This article is originally from my blog post. I put this article to demonstrate how you can write blog posts/articles using AstroPaper theme.
这篇文章原本来自我的 博客文章。我放这篇文章来演示你如何使用 AstroPaper 主题写博客帖子/文章。
Developing a terminal-like website using ReactJS, TypeScript and Styled-Components. Includes features like autocomplete, multiple themes, command hints etc.
使用 ReactJS、TypeScript 和 Styled-Components 开发一个类似终端的网站。包括自动完成、多种主题、命令提示等功能。
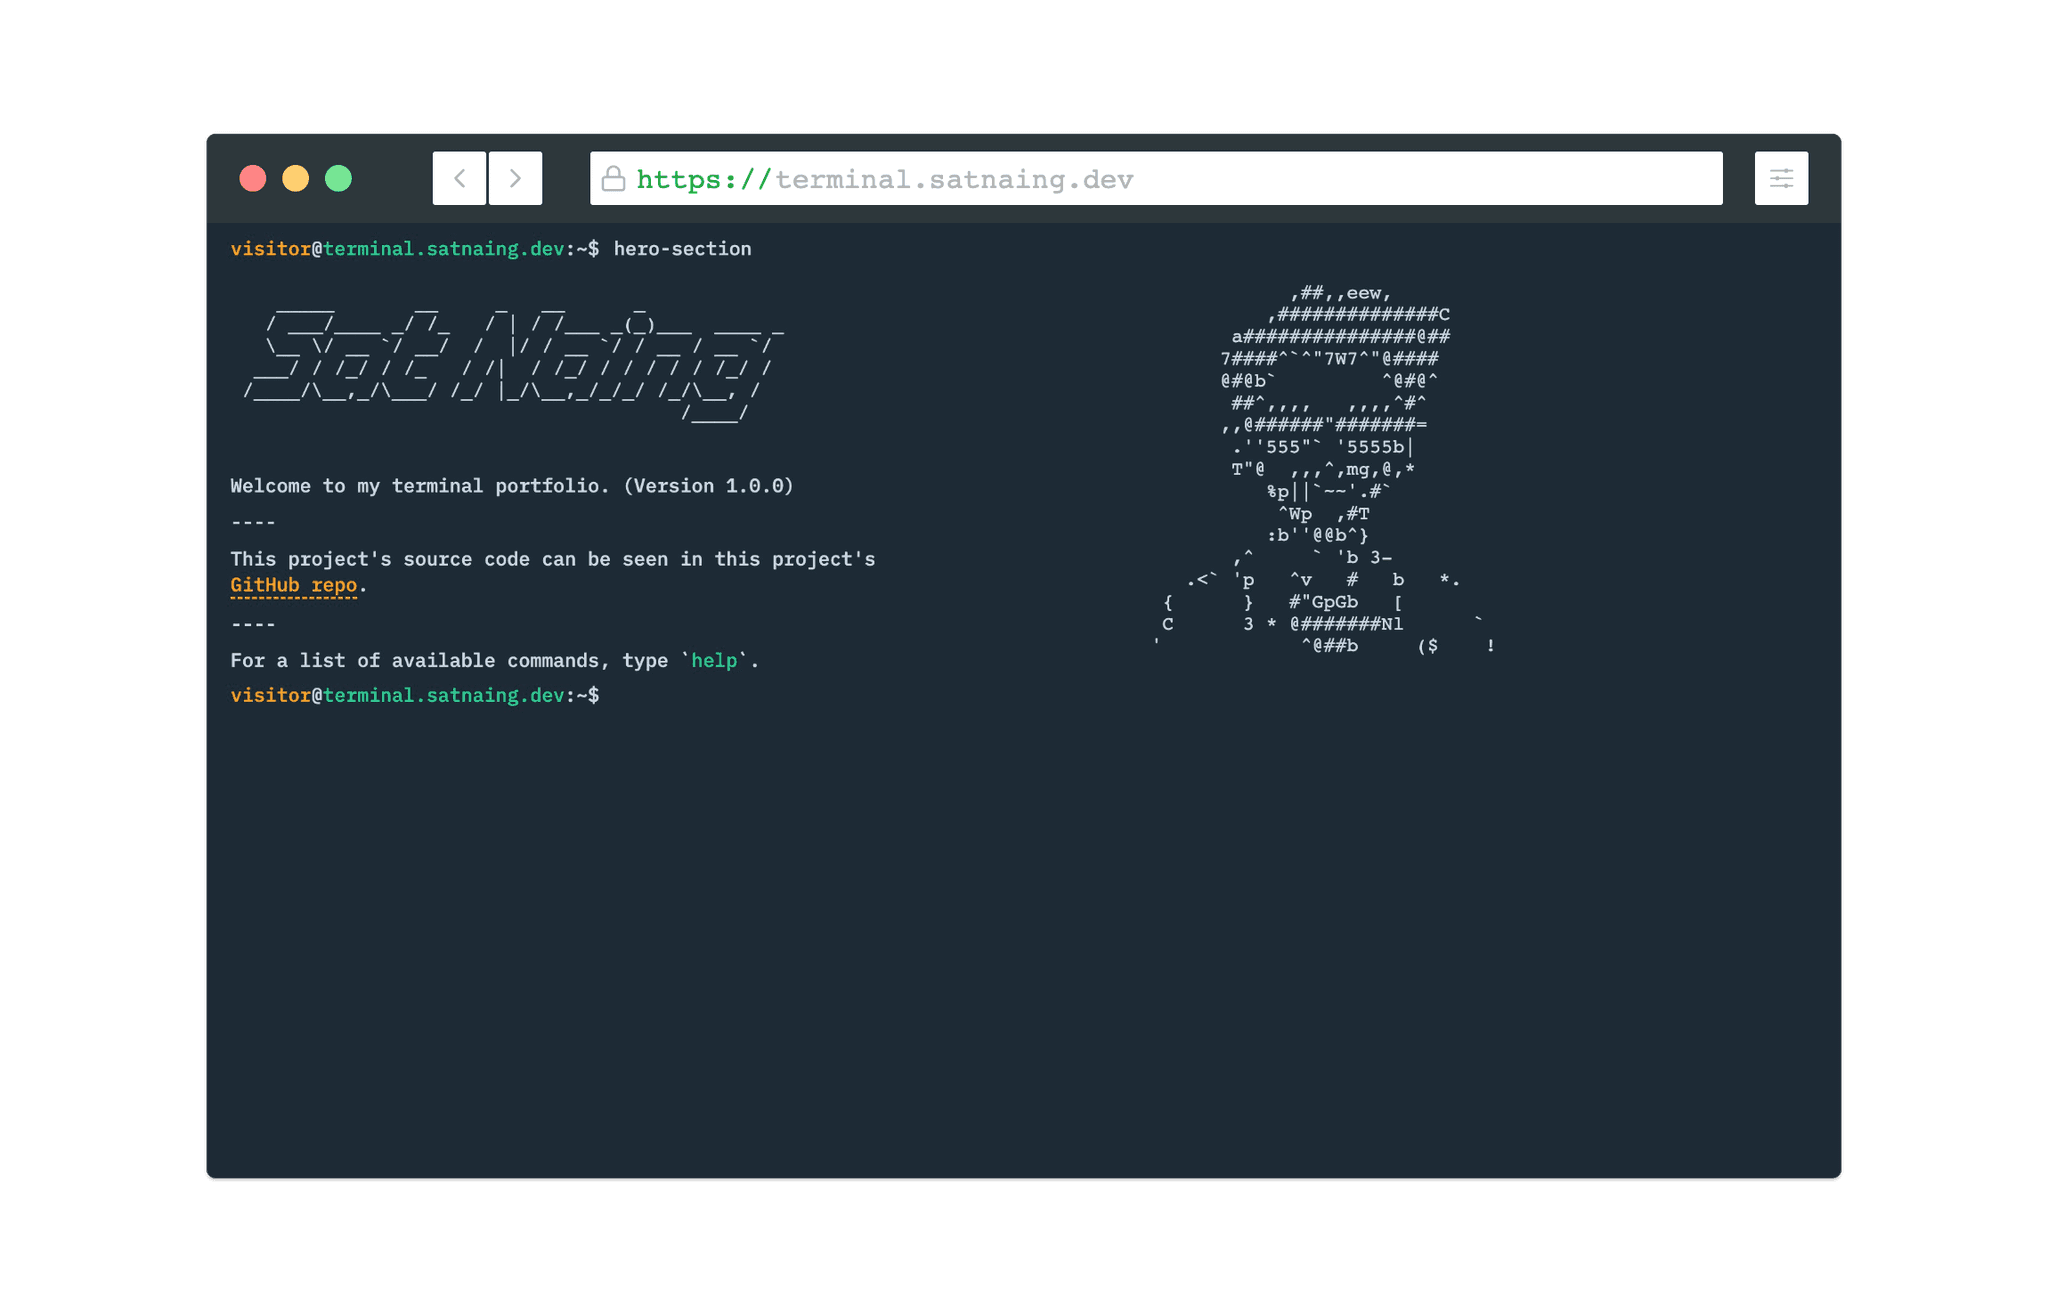
Table of contents
Open Table of contents
Intro
介绍
Recently, I’ve developed and published my portfolio + a blog. I’m glad I got some good feedback for it. Today, I want to introduce my new terminal-like portfolio website. It is developed using ReactJS, TypeScript. I got this idea from CodePen and YouTube.
最近,我开发并发布了我的作品集 + 博客。我很高兴为此得到了很好的反馈。今天,我想介绍我的新类似终端的作品集网站。它是使用 ReactJS、TypeScript 开发的。我从 CodePen 和 YouTube 得到了这个想法。
Tech Stack
技术栈
This project is a frontend project without any backend codes. The UI/UX part is designed in Figma. For the frontend user-interface, I chose React over pain JavaScript and NextJS. Why?
这个项目是一个前端项目,没有任何后端代码。UI/UX 部分在 Figma 中设计。对于前端用户界面,我选择了 React 而不是痛苦的 JavaScript 和 NextJS。为什么?
-
Firstly, I want to write declarative code. Managing HTML DOM using JavaScript imperatively is really tedious.
-
首先,我想要写声明式代码。使用 JavaScript 命令式管理 HTML DOM 真的很繁琐。
-
Secondly, because it is React!!! It is fast, and reliable.
-
其次,因为它是 React!!!它很快,很可靠。
-
Lastly, I don’t need much of the SEO features, routing and image optimization provided by NextJS.
-
最后,我不需要 NextJS 提供的许多 SEO 功能、路由和图像优化。
And of course there’s TypeScript for type checking.
当然还有 TypeScript 用于类型检查。
For styling, I took a different approach than what I usually do. Instead of choosing Pure CSS, Sass, or Utility CSS Framework like TailwindCSS, I chose the CSS-in-JS way (Styled-Components). Although I’ve known about Styled-Components for some time, I’ve never tried it out. So, the writing style and structures of Styled-Components in this project may not be very organized or very good.
对于样式,我采取了不同于我通常做的做法。我没有选择纯 CSS、Sass 或像 TailwindCSS 这样的实用 CSS 框架,而是选择了 CSS-in-JS 方式(Styled-Components)。虽然我已经知道 Styled-Components 一段时间了,但我从未尝试过。所以,这个项目中 Styled-Components 的写作风格和结构可能不是很组织或很好。
This project doesn’t need very complex state management. I just use ContextAPI in this project for multiple theming and to avoid prop drilling.
这个项目不需要非常复杂的状态管理。我在这个项目中只使用 ContextAPI 来进行多种主题设置并避免 prop drilling。
Here’s a quick recap for the tech stack.
这里是技术栈的快速回顾。
-
Frontend: ReactJS, TypeScript
-
前端:ReactJS, TypeScript
-
Styling: Styled-Components
-
UI/UX: Figma
-
UI/UX:Figma
-
State Management: ContextAPI
-
状态管理:ContextAPI
-
Deployment: Netlify
-
部署:Netlify
Features
功能
Here are some features of the project.
这里是项目的一些功能。
Multiple Themes
多种主题
Users can change multiple themes. At the time of writing this post, there are 5 themes; and more themes will probably be added in the future. The selected theme is saved in local storage so that the theme won’t change on page refresh.
用户可以更改多种主题。在写这篇文章时,有 5 个主题;将来可能会添加更多主题。选定的主题保存在本地存储中,这样主题不会在页面刷新时改变。

Command-line Completion
命令行完成
To look and feel as close to the actual terminal as possible, I put a command-line completion feature which auto fills in partially typed commands by simply pressing ‘Tab’ or ‘Ctrl + i’.
为了看起来和感觉尽可能接近实际终端,我添加了一个命令行完成功能,通过简单按 ‘Tab’ 或 ‘Ctrl + i’ 来自动填充部分输入的命令。

Previous Commands
以前的命令
Users can go back to the previous commands or navigate the previously typed commands by pressing Up & Down Arrows.
用户可以通过按上箭头和下箭头回到以前的命令或导航以前输入的命令。

View/Clear Command History
查看/清除命令历史
previously typed commands can be viewed by typing ‘history’ in the command line. All the command history and terminal screen can be wiped out by typing ‘clear’ or pressing ‘Ctrl + l’.
以前输入的命令可以通过在命令行中输入 ‘history’ 来查看。所有命令历史和终端屏幕可以通过输入 ‘clear’ 或按 ‘Ctrl + l’ 来擦除。

Outro
结尾
This is a really fun project, and one special part of this project is I had to focus on logic rather than user-interface (even though this is kind of a frontend project).
这是一个非常有趣的项目,这个项目的特殊部分是我不得不专注于逻辑而不是用户界面(即使这是一个前端项目)。
Project Links
项目链接